These hints will help you on your way towards having a fun first game of Empires. Have fun, and see you on the battlefield!
In Empires, TEAMWORK IS KEY. Go in alone and you'll take out two or three guys, go in with your teammates and you'll take out an entire forward base.
| Some General Pointers | Infantry Tips | Vehicle Tips | Commanding Tips |
General infantry tips:
- You can choose a spawnpoint from the spawn map, "Enter" (by default). Next time you die, you'll spawn there.
- You can change Classes and Skills in a Barracks, an Armory or at a Flag by pressing "B" (by default) and selecting your new loadout. Changing them anywhere else will not update them immediately.
- You can get extra ammo from Engineers who drop ammo boxes or in Armories.
- If you're out of ammo with only a Barracks in sight, just re-select your class by pressing "B" (by default) and immediately pressing "Accept" to receive your starting amount of ammo.
- Pressing the F key (by default) will bring up the popup menu. You can use the mouse or the keys shown inside the brackets to select different menus.
- When you're dead, You can identify revive engineers by the lighter colour arrows shown on the mimimap. Engineers with Revive will see a red Revive icon above your corpse.

- Your commander can give you waypoints. He knows more about the battlefield than you do, so you should follow it if you want to win.
- Guns do not damage tanks or buildings/turrets. Only explosive devices (grenades, rockets, mortars and mines) damage tanks or buildings.
- As a non-Engineer, you can help construct a building by holding the USE key ("E" by default).
- Headshots do additional damage, the amount of which depends on the weapon used.
- Stick near your squad for extra rank points.
- All weapons have falloff. This means that the farther the bullet travels, the less damage it does. Most weapons work best up close and personal.
An unintended 'feature' you'll see a lot is killspawning. This is where you type 'kill' in the game console. Most servers also allow you to simply type '!kill' in global chat ("Y" by default), although this makes it clearer to the other team about what you are doing. It's a very handy way of quickly moving troops around the battlefield, but be careful not to use up too many tickets.
How to use the Scout class
- Using his Hide skill, the Scout can easily outmaneuver enemy troops. When you see an enemy squad approaching, sit in a dark spot for a few seconds. When the enemy is busy firing at your teammates, hit them in the back!
- You are not invisible when using Hide, just less visible. The more corners you touch, the less visible you are. Still, experienced players may be able to pick you out from the surroundings.
- Scout Sticky Stun Grenades overheat vehicles for 10 seconds. Coordinate with your teammates to take down the disabled tank quickly with more explosives!
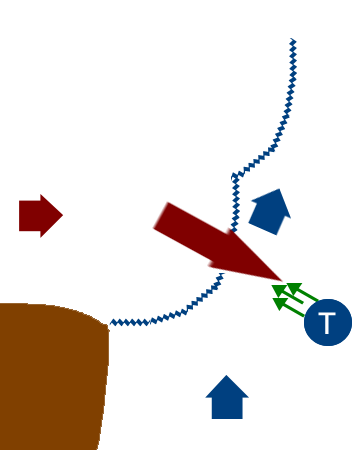
- Scouts have an innate sabotage ability: use this ability on important buildings (Barracks, Vehicle Factory, Radar) whenever you find yourself smack in the middle of an enemy base.
How to use the Rifleman class
- Most weapon's recoil kicks up and to the right. You can use this to hit much more reliably by aiming at chest level.
- Rifleman Sticky Grenades are very good against early-game vehicles. Have a teammate lure the vehicle in a tight spot and slap on a sticky grenade!
How to use the Grenadier class
- Hide mines in spots that have the same color as them. Northern Faction mines have a sand-like color, while Brenodi Empire mines are black.
- A mortar shot square in the chest will usually kill enemy infantry instantly, but it takes some experience to pull it off. Attack from above for the element of surprise!
- Destroy unbuilt walls quickly with your mortar. It only takes 2 shots.
- Make sure to keep both your RPG and mortar loaded at all times.
How to use the Engineer class
- Your main role is support. Drop ammo, heal allied infantry and tanks and use the Revive skill to get downed teammates back into the fight.
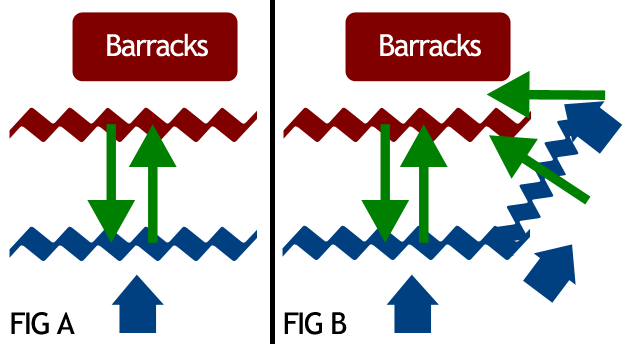
- Placing Engineer Turrets right next to the Barracks at the start of the game is generally not a good idea. Commanders can always protect their location by purchasing their own Turrets. Securing Refineries before the enemy team gets to them and locations for forward bases should be the top priority, since controlling territory and resources is what makes the difference between winning and losing.
- The Repair Upgrade skill lets you build a lot faster, thus wasting less time building and allowing for more time moving up. This is extremely important at the start of a game when your Commander needs the bases built quickly. Additionally, this skill will give you the ability to complete a Turret before the enemy closes in.
- Cameras / Radars display positions of nearby enemy infantry units / vehicles on your HUD. This is especially invaluable on closed-quarters maps such as District or Escort. Even on larger maps, Cameras and Radars deployed in strategic positions (around corners, in foliage, etc.) can serve as an early warning system to you and your team mates.
- The Seismic grenades cause little damage to infantry or tanks. They are best used against buildings and other Engineers' deployables, but not against anything mobile.
Dealing with Turrets
- The best way to destroy a turret is with three well-placed Seismic grenades. Alternatively, a grenadier can use his missile launcher or his mortar to quickly take them out from a distance. The Rifleman also has a few regular grenades that can do the trick, if you're desperate. Shooting them with your machine gun, though, is not a good way to destroy them. Like all buildings, turrets are immune to regular gunfire.
- You can throw grenades at Level 1 turrets from far away, because you can throw grenades farther then they can shoot. But once they get to level 2 and 3 you will need a new tactic for destroying them: tanks and grenadiers are the easiest way to destroy a turret, but you can try creating walls to creep up on them with another engineer, or use the geometry of the map to find a way to get close without them shooting you.
Dealing with Walls
- One of your first ideas might be to build a giant wall around your base. This is a very bad idea. Remember, you've got to go out and claim that territory before the enemy does! Walls take time to build, time that you need to spend making Refineries and turrets and anything else the commander drops for you.
- The best use of walls is in strategically placed, small segments. Just a segment or two of walls can be used to provide cover from turrets and to block in tanks or enemy command vehicles. Instead of one massive line of walls across a base, a few segments carefully placed can defend buildings against rocket fire and forward APCs from enemy attack. (Don't trap the APC by surrounding it completely, though!)
- Attacking walls is not an effective way to destroy them- they can take a lot of damage. However, they're weak against the Engineer's build abilities, and he can deconstruct them with his engineering tool quickly and easily. His Seismic grenades will also deal sizeable damage.
Addendum: Offensive Use Of Walls (click to open/close)
Addendum: Defensive Use Of Walls: The C-Formation (click to open/close)